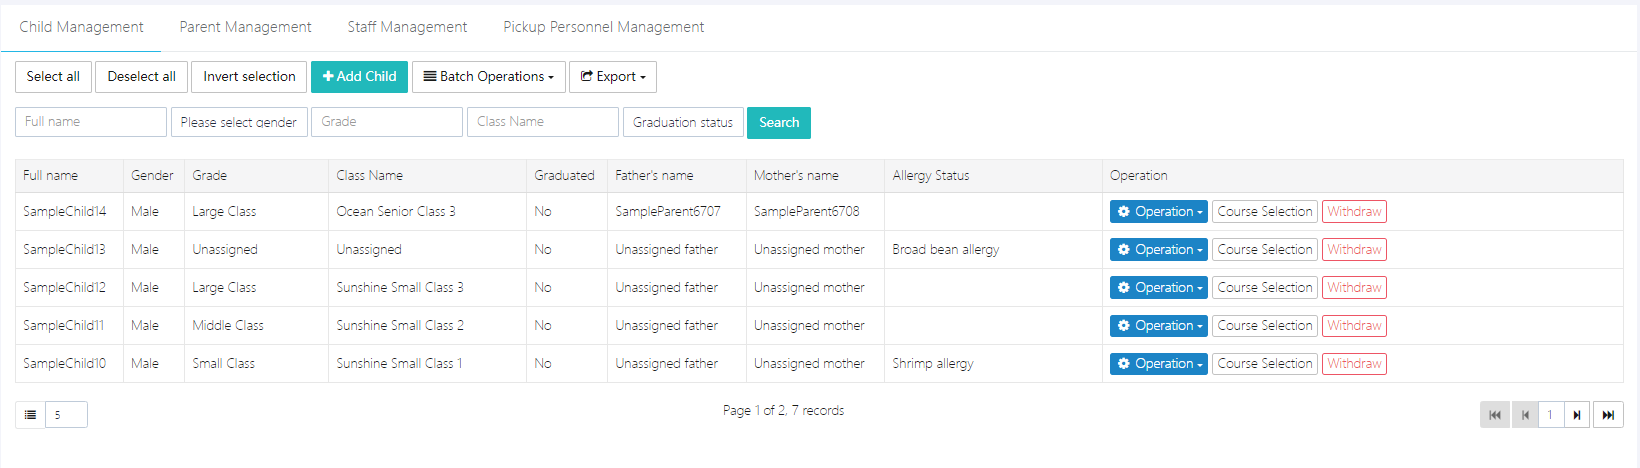
Child Management
Users can access Child Management via [Users & Roles] -> [Personnel Management] -> [Child Management]. This feature provides information about all children in the school and allows for course selection, parent assignment, and class assignment.
1. Add Child
Click [Add Child], fill out the complete information in the pop-up form, and then click [Submit].
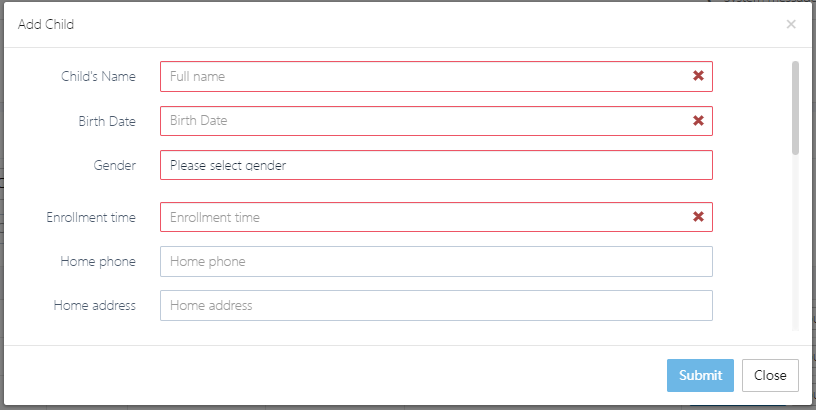
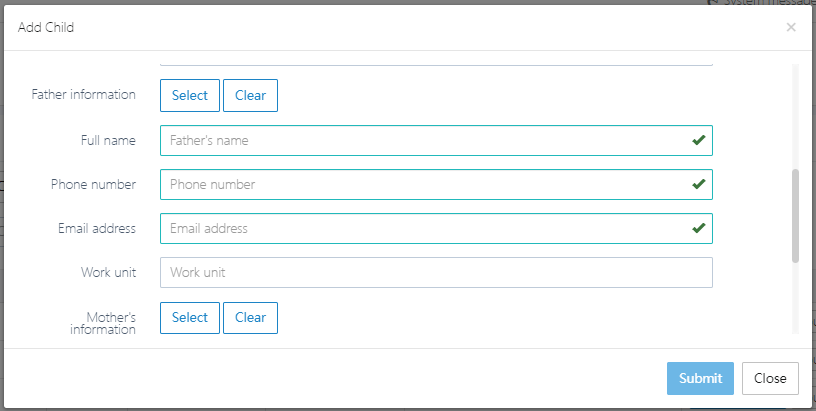
Note: Parent information must also be filled out. If not, it can be added later under [Parent Management] and then matched.
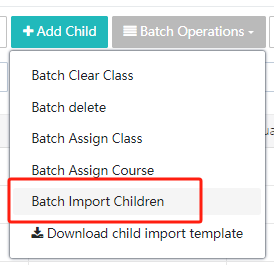
2. Bulk Import Child Information
For bulk import, use the template file provided by the system. Click [Download child import template] to download the file and fill it out.
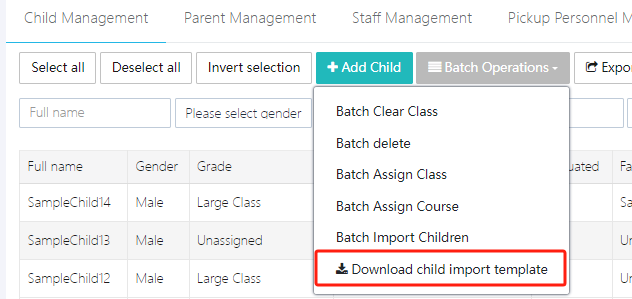
Once completed, click [Batch Import Children] to upload. Note: The class for each child must be filled in. The class must first be created in the [Class Management] module, or the import will fail.
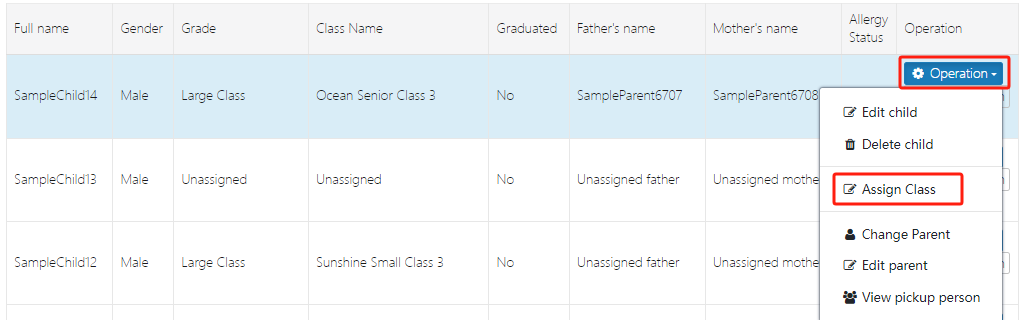
3. Assign Class
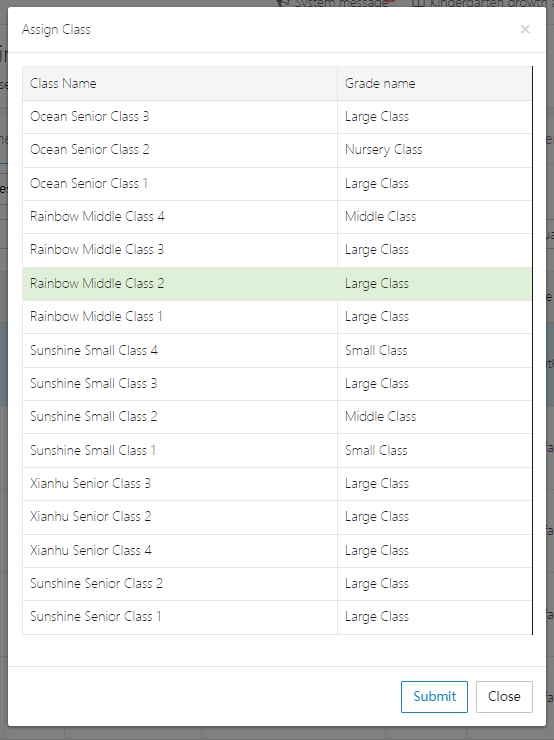
If a child's class needs to change, click [Operation] -> [Assign Class] to select a new class for the child.
After selection, click [Submit] to confirm.
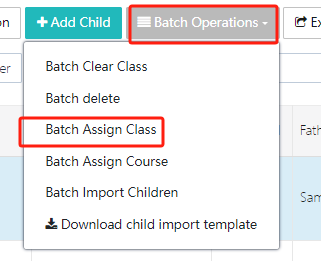
For bulk operations, use [Batch Operations].
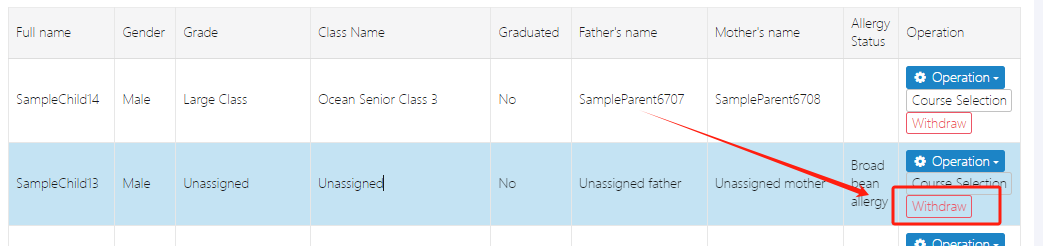
4. Withdraw from School
If a child withdraws from school, their information needs to be deleted from the system. Click [Withdraw] to perform this action. Note: Once withdrawn, the child's information will be marked as deleted in the system. If the child returns to school, a new account must be created, and previous pickup codes will no longer work.
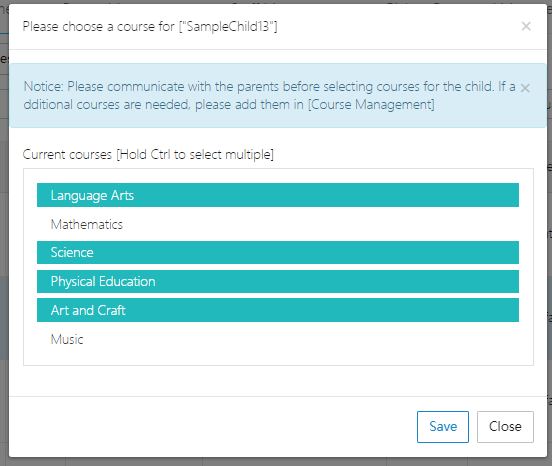
5. Course Selection
The school administrator must first set up courses under [Course Setup] before the child can select courses here. Click [Course Selection], and the list of courses set by the school will appear. After selecting, click [Save] to confirm. Note: If the course is paid, the change will generate a corresponding bill.
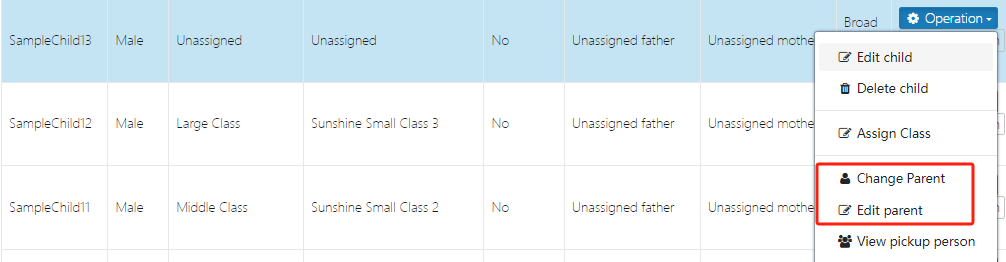
6. Edit/Change Parent Information
If the parent's contact information changes (mainly the phone number), the administrator should go to [Operation] -> [Change Parent] or [Edit Parent] to make the update.
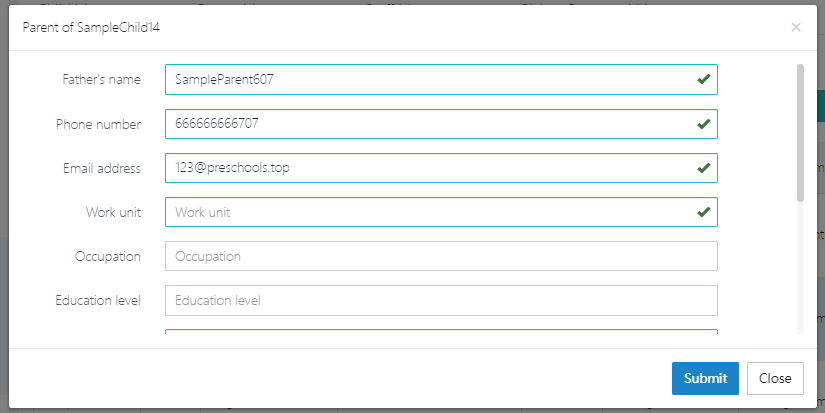
As shown, to modify the parent's phone number, click [Edit Parent], make the changes, and click [Submit].
7. Query Pickup Person (Non-Parents)
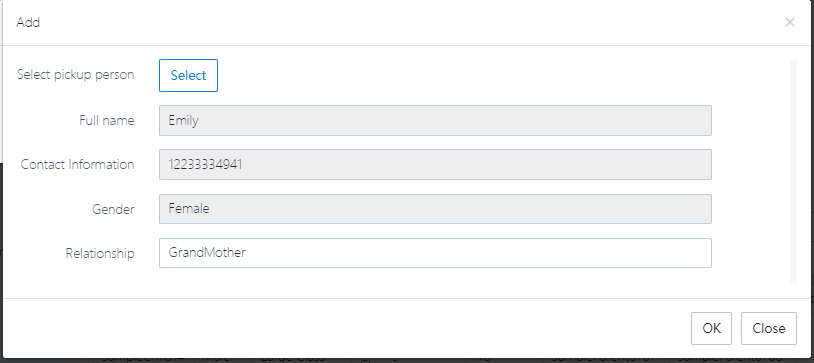
A pickup person is a third party who picks up the child, such as a nanny, housekeeper, or relative. To add a pickup person, click [View Pickup Person]. Parents and schools should carefully verify the identity information of the pickup person.
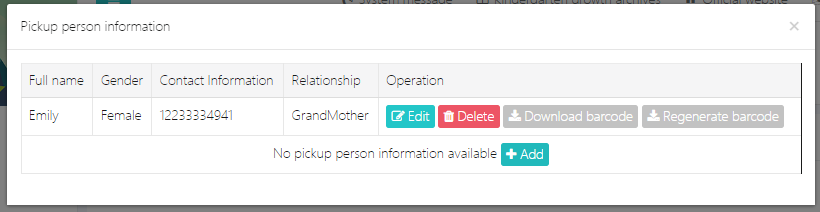
To delete the pickup person, click [Delete], or to add one, click [Add].
If the pickup code is lost or suspected to be stolen, it can be regenerated by clicking [Regenerate Barcode]. The old code will immediately become invalid.
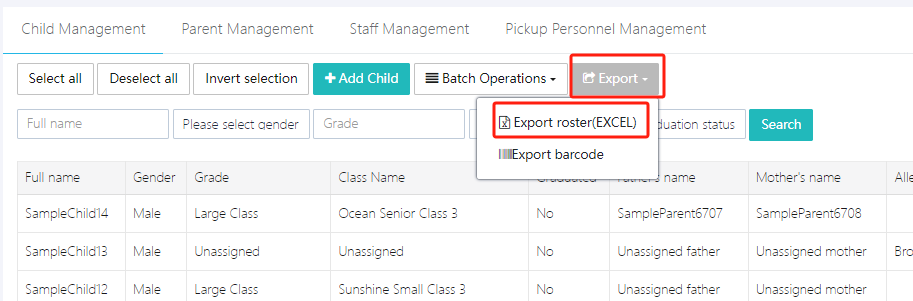
8. Export Roster
To export the list of all children, click [Export] -> [Export Roster (EXCEL)].
9. Export Pickup Code
Parents can log into the system via mobile to find their child's pickup code, or teachers can export and send it to parents in bulk. Parents can save it on their phones.
Click [Export] -> [Export Barcode] to perform this action.
10. Delete Child
To delete a child, click [Operation] -> [Delete Child]. Note: Deleting will also remove the associated parent information. This deletion is irreversible. If the child returns to school later, a new account must be created.