Approve Admission
This module is used to manage student admission applications, supporting functions such as reviewing applications, updating statuses, batch operations (delete/export), and sending SMS notifications. Administrators can efficiently handle the admission process to ensure data accuracy and operational convenience.
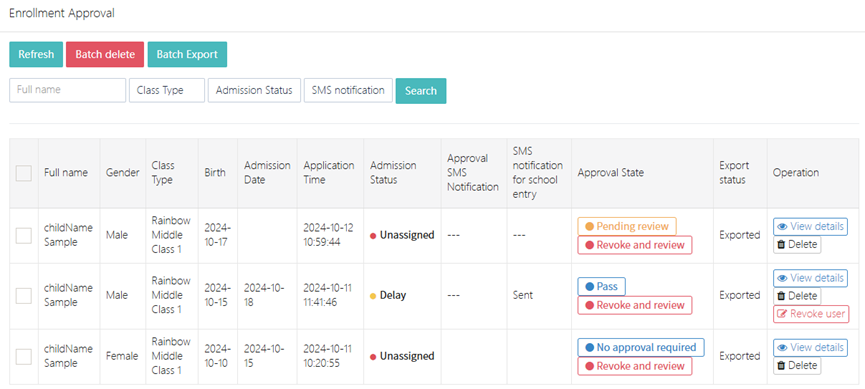
1. Admission Application List Management
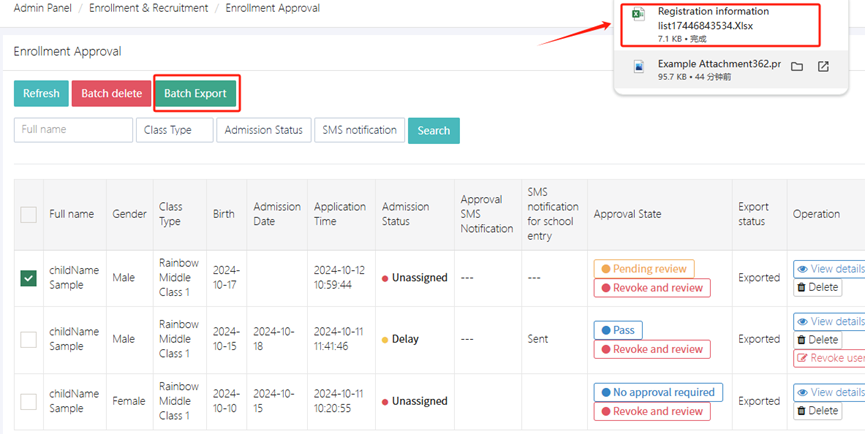
- Top operation bar:
- Refresh: Updates the application list data in real-time.
- Batch delete: After selecting multiple applications, delete them with one click.
- Batch export: Export the selected or all data to an Excel file (e.g., list17446843534.xlsx).
- Search bar: Supports quick filtering by "Name," "Class type," and "Admission status."
2. Single Application Approval Process
- View detailed information
Click View details to enter the student details page, which includes:
- Basic information (Name, Gender, Date of Birth, Ethnicity).
- Family address (e.g., Health Canada Headquarters...).
- Health and history information (allergy history, medical records, etc.).
- Other custom fields (e.g., whether the student has siblings attending, past educational experience).
- Attachment management: Upload or download relevant files (e.g., Example Attachment362.pr).
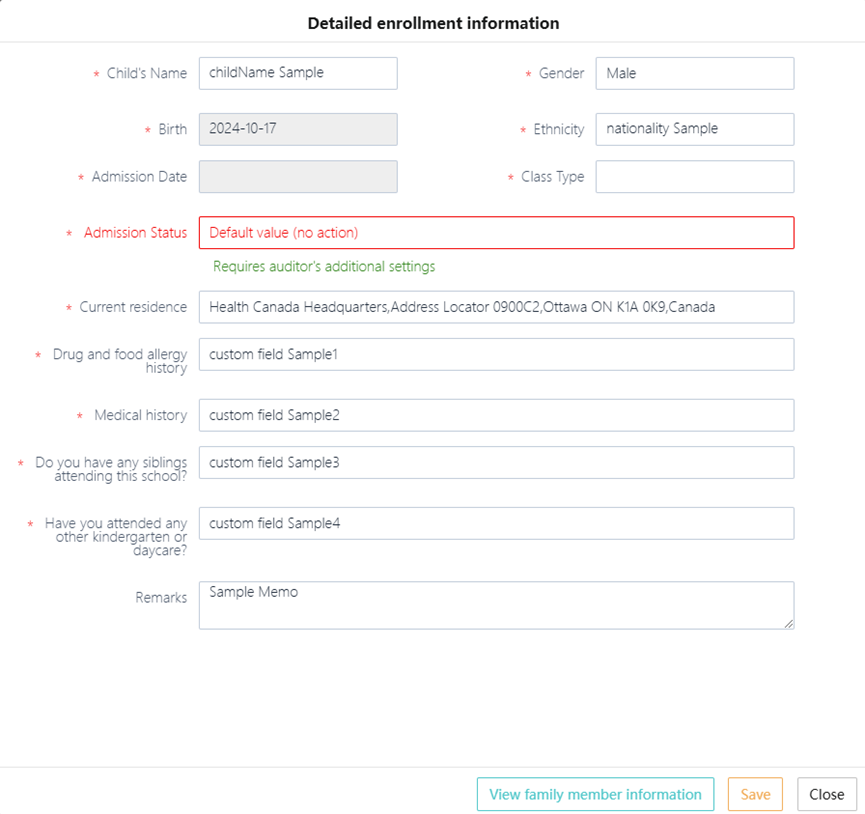
- View family member information
At the bottom of the student details page, click View family member information to enter the family member management interface.
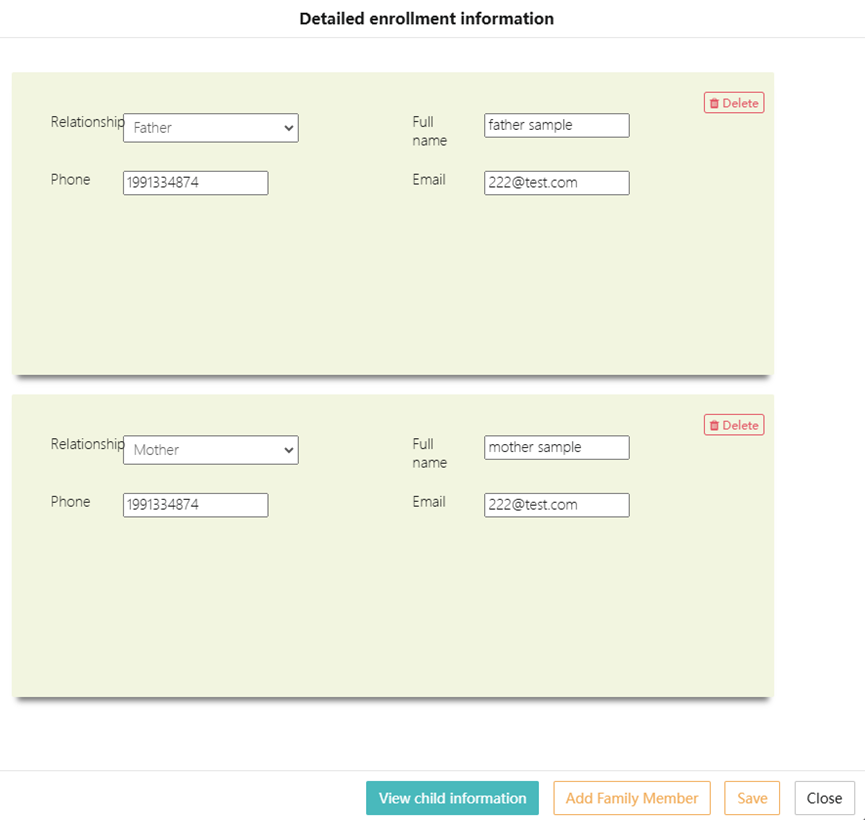
1) Add family member
Click Add Family Member, a new form will pop up. Fill in the following required information:
- Relationship (Father/Mother/Other).
- Contact number (must verify format).
- Name.
- Email (optional).
Click Save to save the information, and the system will automatically sync it to the student's file.
2) Delete family member
Click Delete on the right side of the family member entry, and confirm to remove the member's information.
Note: Deletion cannot be undone, proceed with caution.
3) Edit and save
After modifying the existing family member information, click the Save button at the bottom to save the changes. Click Close to exit the page. Unsaved changes will be lost.
- Update approval status
On the list page or the details page, select the following operations:
- Pass: Mark as approved and send an admission SMS notification.
- Delay: Require additional materials or further review.
- Revoke: Revoke an approved application and return it to the pending status.
- Send SMS notification
1) Set SMS sending time
In the approval list page, find the target record and double-click the SMS notification for school entry column to enter the details page.
In the approval page, fill in the following fields (marked * are required):
- SMS entry time 1*: First SMS sending time (e.g.,
2024-10-20 09:00). - SMS entry time 2*: Backup SMS sending time (optional, triggered if the parent does not confirm).
The time format must follow the system's requirements (default is YYYY-MM-DD HH:MM).
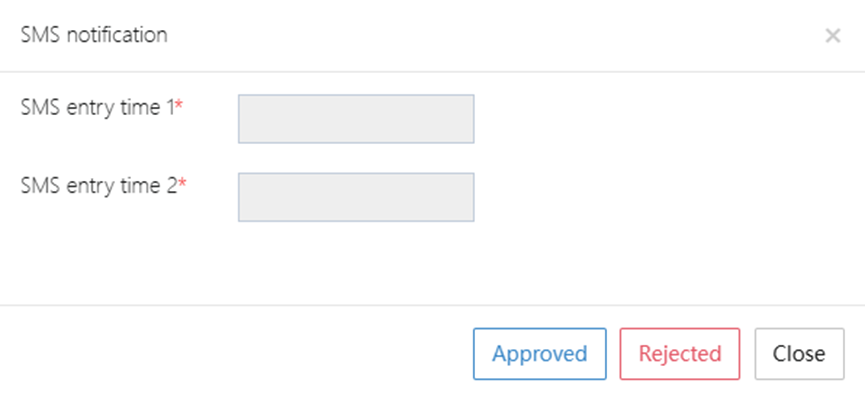
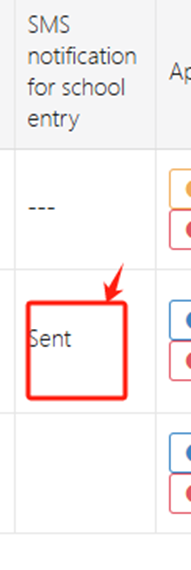
2) Send SMS when approved
Click the Approved button to complete the approval, and the system will automatically send an admission confirmation SMS based on the set SMS entry time 1.
- Status display: After successful sending, the record will be marked as Sent (see the example in the interface).
3) Handling when approval is rejected or closed
- Click Rejected: If the application is not approved, no SMS will be sent.
- Click Close: Close the current approval window, and any unsaved SMS time settings will be lost.
3. Batch Operations
- Batch delete: Select multiple application records → Click Batch delete → Confirm deletion.
- Batch export: Select records or select all → Click Batch Export → Choose export format (default is Excel).
4. Common Status Descriptions
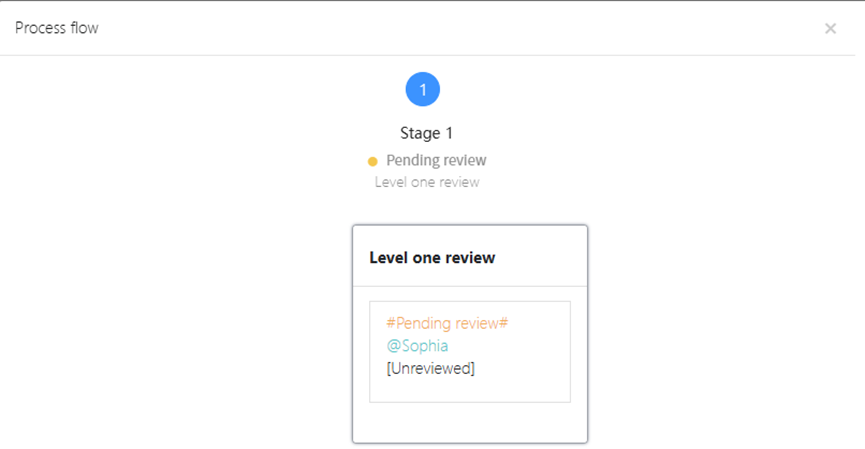
- Pending review: Default status for new applications, needs manual review.
- Approved: The student is eligible for admission, an SMS notification needs to be sent.
- No approval required: Automatically eligible for admission (e.g., internal recommendations).
- Delay: Requires the parent or school to provide additional materials.
Notes:
- Before approval, please verify the student's health information (e.g., allergy history).
- The exported file is saved to the system's download directory, and the file name includes a timestamp (e.g., list17446843534.xlsx).
- After revoking an approval, an SMS notification must be triggered again.